


 by Raymond Alexander Kukkee

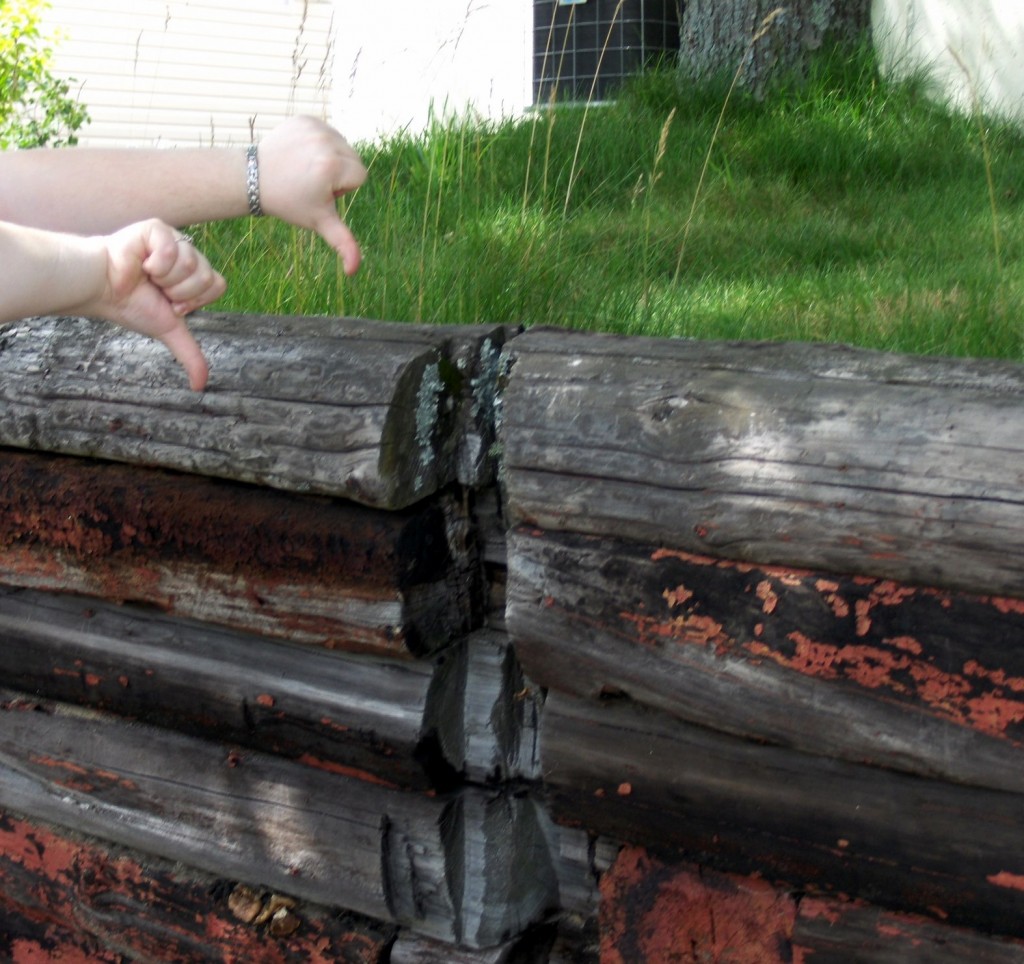
Was this Railroad Tie Retaining Wall DesignToo High?
, and time to cut the grass again.
That yard.
Perhaps you have cut the side yard first, perfectly and evenly and easily, but then look at the long grass in the back yard with trepidation. Perhaps you have even seen a retaining wall built with railroad ties in your neighborhood.
It is part of the lawn that is far too steep and the soil is precariously eroded from endless water runoff.
It is impossible to cut the grass safely with a lawnmower, so you haul out the weed whacker and start giving the treacherous area a tedious, crude haircut one more time.
You know you need a retaining wall of some kind, but have procrastinated in building one, for the cost of manufactured, interlocking concrete stones commonly used to construct retaining walls is too high for your budget. How can you build an inexpensive retaining wall?
The answer may be to build a retaining wall with railroad ties.
Timber and Railroad Tie Retaining Walls
are
creosoted or chemically treated timbers that have been historically used to lay railway track all the way across North America.
The treated wood ties resist decay for years but are eventually replaced as a matter of safety. Replacement on the railroad itself may be with new timbers --or the increasingly common concrete rail bedding ties. The replacement program has
left millions of used and unused railway ties, switch timbers, and other large creosoted timbers available for other purposes including landscaping.
T
o find a source of railway ties, ask at your local building supply, landscapers, building contractors, or the friendly folks at your nearest rail yard.
*NOTE: Incidentally, do NOT feel free to help yourself to piles of ties you may happen to see along the railway tracks. Trespassing on railway property is both illegal and dangerous.
Buy railroad ties from reputable contractors that often have contracts to legally remove hundreds, even
thousands of ties at once, and do stockpile them for sale.
Expect to pay higher prices for new, or better quality used timbers.
Choosing Railroad Ties
Choose ties that are not rotten, have no major splits in them, and preferably, are all the same size for convenience in construction. Some ties will be deteriorated, others will seem to be as good as new.
Choose well. They will be part of your wall for a long time.
*NOTE: Caution Required!
*Creosoted timber is very heavy. Railroad ties usually weigh well over a hundred pounds apiece. Ensure you have adequate help to carry, load, or move railway ties safely.
*DO wear leather gloves and keep arms and legs covered when working with creosoted wood; slivers of treated or creosoted wood can cause infection and wounds with creosote in them heal very slowly. If you do get wounded with a sharp fragment of creosoted wood, seek medical advice!
Tools and Supplies You will Need
- You will need: railroad ties and timbers as calculated,
- pickets,
- a supply of crushed stone,
- some coarse gravel,
- a length of 4" perforated weeping tile,
- measuring tape,
- sledge hammer,
- carpenter's line or string,
- sections of " steel reinforcing bar or the equivalent,
- shovel, pick axe, rake and other lawn tools
- carpenter's line level and a plumb bob,
- a power drill and appropriate drill bits,
- a hacksaw, grinder or power cutoff saw with a blade for cutting steel,
- A chain saw, *preferably equipped with a carbide-tipped chain if available. *Creosoted timbers, especially dirty used ones, dull saw chains quickly.
- Rent a vibrating plate packer if possible to compact the back fill as you go
- Backhoe services will be helpful on a large, difficult project.
Prepare to Build the Retaining Wall
- Start at the lowest area and stake the layout for the wall using pickets. If the design is more complex, do draw a plan first.
- Remove the top layer of grass and organic soil down to the hard mineral soil level. Remove stones and level the trench.
- A retaining wall is ideally best kept level from one end to the other, so DO excavate the base to level. Excavate the high end down if at all possible. Fill the lower end as necessary ONLY as a last resort. Pack or tamp any fill material adequately if it is necessary to bring up the grade for the foundation.
- Make sure the trench and base is wide enough to include a drainage tile if wet conditions are present.
Address and Solve Drainage issues:
DO remember there can be serious drainage issues with retaining walls.
Failure to provide drainage may result in wall washout, serious instability, and ultimately, even total failure and collapse of the wall.
If soil conditions are very wet, installing a perforated weeping tile on the uphill side of the retaining wall
will allow the water to escape. To ensure free drainage down the full height of the wall,
backfill behind each course of ties with coarse gravel so water will percolate down to the weeping tile that will be installed level with the first course of timbers.
If surface water runoff is a serious issue, consider installing a
French drain on the upper end of the drainage area to provide surface drainage. See
"How to build a French Drain".
Structural, Stability, and Design Issues and Solutions:
If the wall is long, and the site slopes sideways and can not ideally be made level because of bedrock or other considerations, consider modifying the design to include dividing or even off-setting a portion of the wall to take advantage of the
unique features of the site. For example,
level individual sections, even at different elevations, and
consider installing a convenient access stairwell to take advantage of the division.
Remember that if the wall is long and high, to be stable, it may require installing
dead men' timbers at right angles in alternating rows to enhance structural stability. That process is accomplished by laying a timber at right angles into the wall on alternating courses, with the deadmen timbers extending into, and buried in stable soil uphill.
Deadmen timbers should be placed every eight feet on alternate courses as a minimum, if the wall is very long.
Install galvanized "T" plates,
nailing them securely both to the deadmen timbers and to the adjacent face timbers to prevent the deadmen timbers from pulling out and becoming ineffective as the wall continues to move out under pressure.
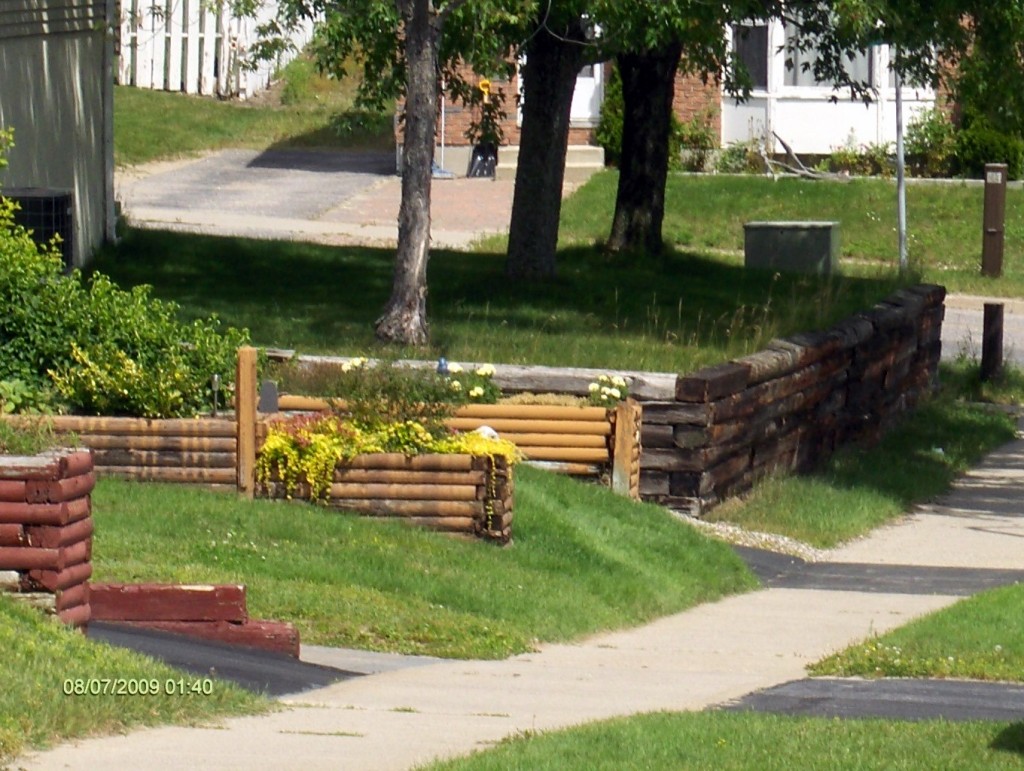
Alternatives to improve stability include incorporating an adjacent natural buttress along the wall, or include one or more, short right-angle, sections of wall into the design as aesthetically-appealing and functional abutments to improve wall stability.
Planting vertical support members in front of the wall similar to installing a fence post, can also achieve extra stability, or use galvanized "cable deadmen" tied to 4' pieces of timber trenched and buried parallel to the wall in solid, stable,
undisturbed soil. The best, natural and
clever design uses natural materials to build a 'buttress along the fence effectively reducing the apparent 'visible height' of the retaining wall as shown by this photo. Note the 'deadmen' timbers in this old, well-built retaining wall.
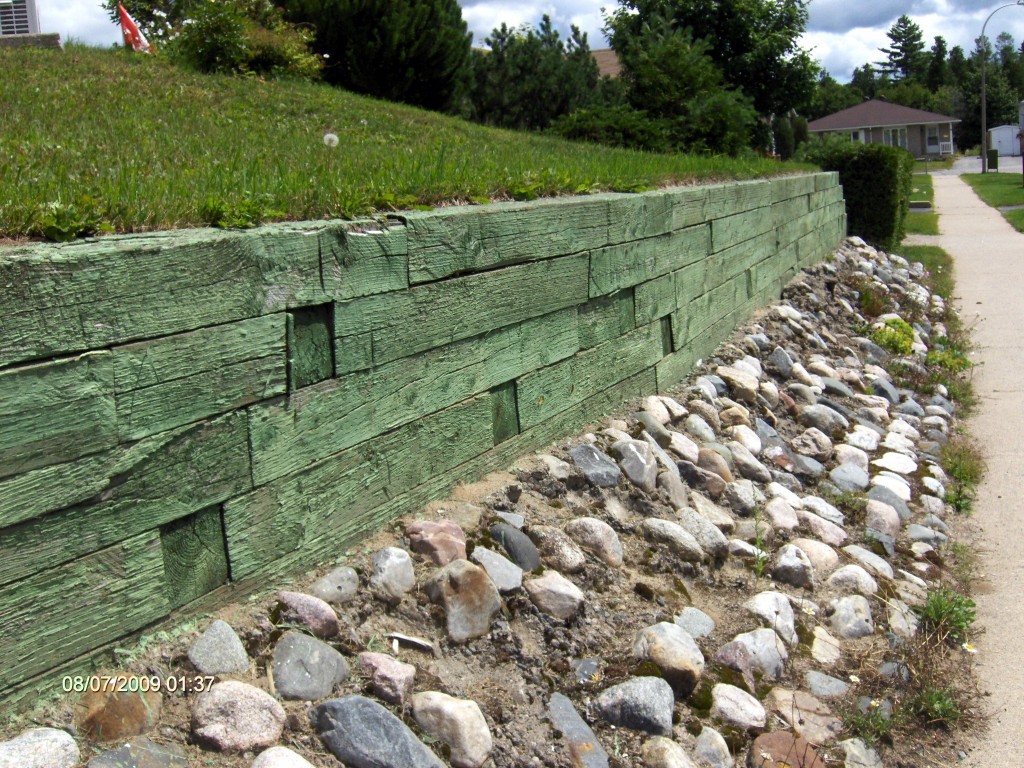 Determining and Minimizing Wall Height
Excessive height of retaining walls can be a safety issue
Determining and Minimizing Wall Height
Excessive height of retaining walls can be a safety issue. Six feet is generally considered to be the maximum, but
DO verify code requirements or limitations on the height of retaining walls in your jurisdiction, regardless of building materials used, otherwise you may also end up installing guard rails or security fencing on top to meet regulations for safety.
To avoid building excessively high walls, consider controlling individual wall heights by
planned terracing, alternating and stepping the timber walls back toward higher ground. Instead of one very tall wall, consider using low, successive retaining walls, with wide terraces and access steps for safety considerations. This can result in better use of the area, and the
opportunity for extra visual appeal terracing can provide.
Three 2' ' high retaining walls with an appropriately landscaped terrace with flower beds and bushes between them may ultimately be far more attractive than one blunt 6' high wall right at the street.
Here's a really good example of smart retaining wall use for beautiful landscaping even though it is drystone construction. The same principles apply for timber construction. Lower is better, safer, and easier to construct.
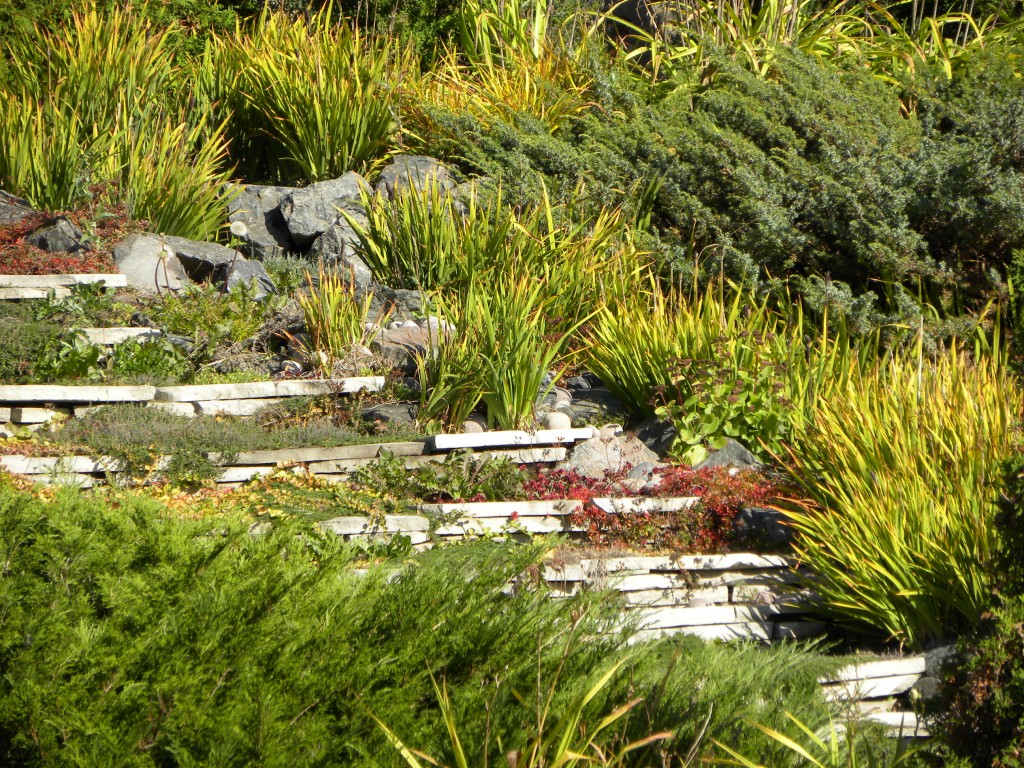
Clever use of stepped, lower retaining walls instead of of one TALL retaining wall
to provide stability and avoid excessive settling of the finished wall.
String a carpenter's line to keep the wall straight, --or curve and angle as desired. Pack the crushed stone with a mechanical packer if available.
Install the first row of ties on the bed of crushed rock and carefully level it.
Cut 2' or longer sections of construction steel reinforcing bar or other suitable steel bar.
Drill holes through the ties at both ends, and using the sledge hammer,
drive the steel bars into the ground to hold the ties in place securely. Check to make sure they are lined up properly.The first course is now complete.
Install the perforated weeping tile level with the bottom of the timber, on the UPHILL side of the timber, placing the holes facing DOWN, and cover the pipe with crushed rock. Route the ends of the weeping tile to a suitable location where they can be terminated in crushed rock or gravel.
Backfill the slope to the top of the first row, ensuring the placement of coarse, free-draining gravel immediately behind the timber.
Determine the final height of the wall after the first layer is installed. That will determine
how many more courses of timbers you require, keeping in mind that a retaining wall should not be more than 6' high for safety considerations.
Establish the grade required to the top of the wall using a
transit level, a
line level, or
sighting a 4' carpenter's level.
Mark the top of the finished grade on a picket or stake driven into the ground at the outside of the first row, for a 'batter board' .
Proceed with the second course, of railroad ties,
alternating the joints as is done in brick or block work.
Remember the old masonry rule "one over two, two over one" so there are never two joints vertically adjacent.
Avoid vertical alignment of joints. Stagger subsequent joints in each level for strength.
Proceed with subsequent courses of timbers,
fastening each in place with reinforcing steel rod driven into the preceding layer.
Ideally, fill, wet down, and compact the gravel and dirt behind each course of timbers as you go for stability and less settling in the future. Use a motor-driven vibrating plate packer if one is available.
Complete and secure the top course, pegging it securely with reinforcing rod, or
consider lag-bolting the last course in place with long galvanized lag bolts if available.
Backfill immediately behind the timbers on each course with coarse gravel.
Establish the final grade as required, compacting it well, and
top with soil as required.
Check and correct the final grade, filling as necessary.
Rake and pack with a water-filled lawn roller.
Provide lawn seeding or sod and landscape as desired.
Now that your retaining wall is complete, your yard will be much more useable, it will be much easier to maintain, and you can breathe easier cutting the grass with the lawn mower. It will be safer.
The
best part is,
building a retaining wall with railroad ties did not break the bank.
**
Photo Credits © wlk photography
Is that Incoming I hear?


The house I grew up in had these walls and tons of steps from rail road ties. They last for years and years!
They were handy. We walked down those steps for 20+ years and though the ones we put the most weight on had some rot problems, once they were replaced, the whole wall and steps were so solid, you swore they were made out of cement. Meanwhile the neighbor’s walls made out of stone were always falling down :D
Kathlyn, that is perhaps the greatest benefit of building retaining walls with railway ties or timbers. The structure flexes and is not damaged by frost like stone and mortar structures are. Thanks for visiting! ~R
Raymond explained to me in a G+ conversation that.. “They’re particularly handy where there’s a lot of frost heaving, which destroys masonry work that is not supported by a reinforced foundation.”
That’s where we had them, in Minnesota, now it makes a lot of sense why the walls were made of railroad ties. I remember the walls would frost over every winter, but it never did them any harm. The wood is practically tarred.
It’d be neat to see how they treat the RR ties before they put them down, I’m sure they get soaked in something similar to what they put on wood boats to keep them from getting waterlogged.
I think the boats are also treated with a creosote or tar equivalent, I’m not positive about that one, Kathlyn. I do know on the old-style construction they used ‘oakum’ and tar to seal the joints…and apparently it did a great job. “:)
To which Raymond replied “they load piles of timbers into a vacuum vessel filled with liquid creosote, then vacuum pump the air out. Doing so pulls the air out of the wood . When when the pressure is returned to normal, the creosote is forced into the wood that is sitting in the creosote….the creosote penetrates the wood that way.”
I had never known this, and the comments on G+ might help someone here on the bloggysphere as well. I know from personal experience how useful RR ties are as retaining walls and stairs. We had them around the back of the house I grew up in, our house was built into a hill, and the back yard led down into a swamp, so the RR ties were used to hold the hill back so there was some level land before the swamp and so there was some area the swamp could flood into. Despite the swamp flooding every 5 years or so all the way up to the ties, and the freezing conditions every winter, the retaining wall and steps always held up. Highly recommended!
Thanks for giving us that example of good use of a retaining wall Kathlyn–railroad ties are very versatile and can be successfully used under really tough conditions. Your experience validates the durability of railroad ties. No doubt about that! ~R
Pingback: Building A Shed On Railroad Ties | Woodworking Web