
"A retaining wall is much like a dam, and must withstand the forces of direct soil pressure"
Cinder Block Retaining Wall or Concrete Block?
For purposes of retaining wall construction, building a cinder block wall may be considered equivalent of building a retaining wall with 'concrete' block. Cinder blocks are much lighter in weight and as such may be preferred, reducing the level of hard work required. The blocks may be the same standard dimensions, and in some instances may even be used interchangeably. Regardless, let's go with Retaining Walls: Build a Cinder Block Retaining Wall-for homeowners and DIY'ers fortunate enough to have access to high-quality cinder blocks. The photo below shows a retaining wall built of concrete blocks simply because cinder blocks are no longer available in the author's geographic location.
"I like cinder block better, they are lighter to work with than concrete blocks, and won't rot like timbers do".
"Cinder block?" Why would you want to build your retaining wall out of cinder block?" What's the difference? Cinder block is cast using coal cinder. Concrete blocks are cast using stone aggregate and cement.
"But for a retaining wall? You want heavy block for a retaining wall, don't you?"
When considering building a retaining wall with cinder block, that may be a reasonable and logical question. The purpose of any retaining wall is to prevent downhill or ground movement and soil erosion, so to some extent, weight is a relevant factor. A retaining wall is much like a dam, and must withstand the forces of direct soil pressure, but it must also withstand settling, and the destructive heaving and displacement caused by frost. All hollow-cavity blocks can be filled with rock or gravel ballast as the wall is constructed to provide for additional weight.
A cinder block wall properly designed can respond to all of these challenges.
Essential structural considerations include adequate design and provision for drainage, footings, stability, and mechanical reinforcement of the wall itself. Always remember that design safety criteria becomes more critical with increased height.
Here is how to build a cinder block retaining wall, keeping these critical aspects in mind.
Design the Cinder Block Retaining Wall Carefully
-
Make a drawing to ensure details are not overlooked.
-
Are you building the retaining wall in an area that has deep, severe frost penetration? If so, your footings must be deeper than the frost penetrates to provide stability through seasonal freeze/thaw cycles. Why? Wet soil expands when frozen, 'heaving' or raising erratically any structure sitting on it, which can damage the structure. When it subsequently thaws, the soil level subsides in a friable condition, which is unstable. Clay soils are particularly susceptible to severe freezing.
-
What are soil conditions like, is the ground wet continuously? Plan for control of surface water and groundwater disposal if necessary. Saturated soil is easily deformed, can slump at any time, and creeps downhill.
-
How high will the wall be? Structural integrity and safety issues start to become a matter concern where retaining walls are over 6' in height. Consider building successive walls 2' high instead, and take advantage of the usable level spaces between them for landscaping and features.
-
Will the wall be constructed with mortar? If so, you require a solid concrete footing. Shifting, settling and heaving will soon destroy mortar joints, at best leaving unsightly cracks requiring annual repairs.
-
Do you need a building permit? Do obtain any necessary permits in your jurisdiction before commencing any construction.
-
Locate all gas, water and electrical services prior to beginning any digging. Your local utility will gladly flag any services endangered by your construction project.
*Note: If you have to trench deeply, be sure to contact your local utilities to locate any cables, pipes, or other superstructure. Observe safety protocol and safe working practices at all times.
Tools and Supplies Required
The following common tools and supplies are essential.
-
Carpenter's line and chalk line
-
Carpenter's 4' level, line level (use laser level or transit if available)
-
Measuring tape, hammer, wire-cutting pliers
-
Cement trowels
-
Hacksaw or grinder to cut steel rebar
-
Shovel, Picks, hammer, sledge hammer
-
Pickets for staking footing forms
-
Dimensioned lumber to build footing forms (2x6, 2x8 etc. or as required)
-
Cinder blocks 8x8x16 or 10x8x16
-
Steel reinforcing bar, galvanized deadmen anchor cables
-
A mortar mixer rental will come in handy for larger projects.
-
Concrete (ready-mix delivery) and cement mortar for block-laying.
Safety: Let's remember to use all safety protocol, necessary safety equipment, safety glasses, gloves, --make sure tools are in good condition, and most importantly, keep visitors and children clear of the work zone and moving equipment. Safety comes first!
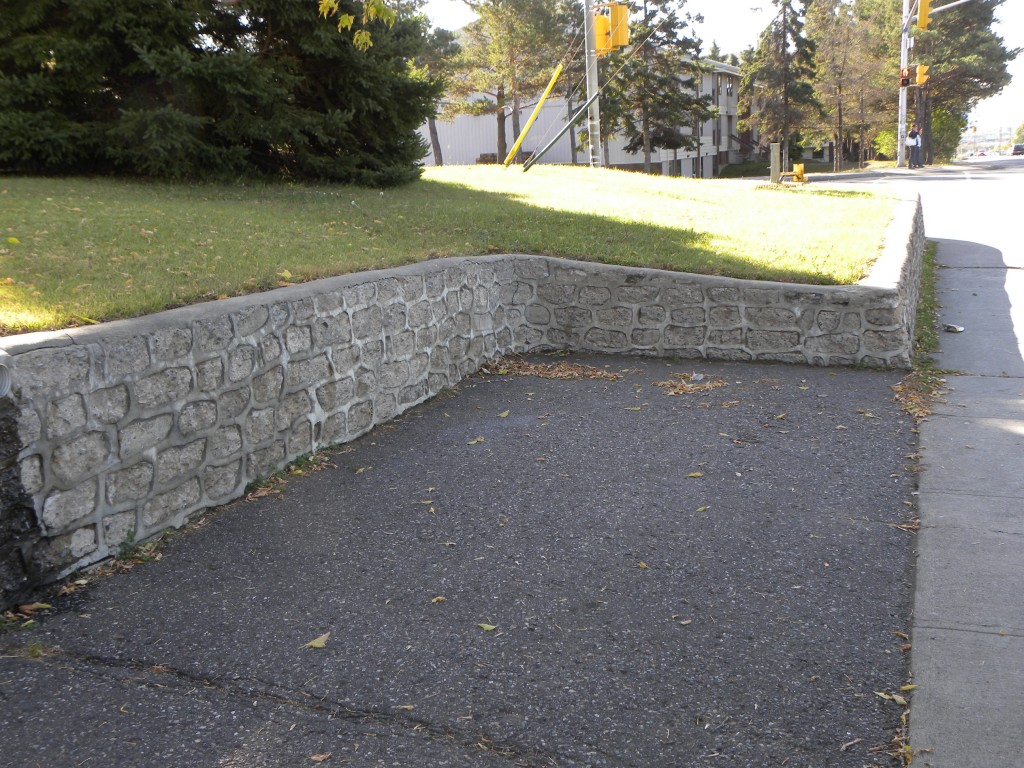
An elegant historical retaining wall built with concrete block rubble


I live in Florida, and I’m planning to build a cinder block retaining wall to level my back yard. It shouldn’t be higher than about 5ft. My yard currently slopes right into my rear neighbor’s backyard so I want to make sure the wall is solid and doesn’t crumble to pieces into his backyard the first time a large storm comes through. Your instructions seem very thorough, but can you provide diagrams for the construction by any chance? Thanks for you site!
Hi Mike,
Because soil and moisture/slump conditions are seldom the same on slopes and hillsides at different locations, it is impossible to recommend a specific size of footing, etc. to you,– but I will forward a generic diagram to you in the next day or so. As a DIY’er, if the soil is known to be unstable in that area, you may wish to consider two parallel walls across the slope, but lower in height to achieve the stability you need–and have a nice step lawn area in between them which can be very attractive for special purposes. Good luck with your landscaping project! ~R
Mike, I live in central Missouri. The frost line here is 20,” so I will trench a footing a little deeper than that. My retaining wall is on a slope and will start at about 18″ and finish pretty close to 6′ high. It runs the entire length of my driveway and there is currently a railroad tie wall that is falling down. Should I have a footing that will have the retaining wall lean towards the higher side? Would that make it more stable and resist the weight of the earth pushing back more effectively?
Thank you.
Dan
Dan, if the existing RR tie wall is collapsing, especially leaning out, that’s a pretty fair indication the soil is unstable, creeping or slumping. Are the conditions very wet? It may be failing because of inadequate drainage, which can be a tremendously important factor.
Your retaining wall on one end is going to be close to 6′ high, it is a good idea to have it ‘lean’ into the hill to some degree. That will help, but perhaps not solve the problem if the soil in that area is known to be constantly slumping, friable and unstable –that can be a real issue and a challenge. If very unstable,– for a block retaining wall, restraint is needed, certainly add galvanized deadmen cable anchors in the sections higher than 3′, and add them every second course of block i.e. course 3 and course 5;. Install them every 8′ of length, and tie them into the block courses.
Alternatively, weight of the hillside itself can be used to counter slumping soil; consider adding a geogrid reinforcement mesh at about the 3′ level, on the higher section, running the geogrid mesh uphill, and loading it with excavated fill –tie it securely with mortar into the block course. (See “How to build a Geogrid reinforced retaining wall) If conditions are really unstable, or if there is a lot of soil vibration from passing traffic, you may even wish to consult an engineering firm. Best luck with your project! ~R
Raymond,
Thank you so much for your reply. The RR tie wall is not leaning out, and I see no real signs that the earth is unstable. They’ve simply been there for 30 years and they are rotting away. However, soil here is very charged with clay so it does expand and shrink as moisture content varies. I will definitely use the geogrid and anchors as you suggest. Do you think it should also lean? If so, how much?
Thank you.
Sorry. Raymond, not Mike…
No problem, Dan! Have a great day!
@ Dan, if the old retaining wall isn’t broken, leaning out or showing sign of stress other than decay and old age, the slope is likely relatively stable and hasn’t been slumping, so the extra expense of a geogrid mesh probably is not necessary.
On the high section, do install deadman anchors, and with an appropriate footing below frost level, very minor lean-in, perhaps an inch. With a clay component you have described the expansion/contraction of clay is the dominant problem; it is absolutely essential to get the footing reinforced and the drainage right–and perhaps even more importantly, backfill the wall with free-draining gravel on the uphill side of the wall to avoid any moisture, frost/freezing/expansion of clay against the block wall. The expansion of clay is a powerful force, keep it away from the structure.
Raymond,
I’m sorry for all of you follow up questions. But I’ve been doing some research into the deadman anchors. All I find on the internet are anchors that are used for timber walls. Therefore, they are made out of wood. How do I make an anchor for a cinder (or concrete) block wall? Is this something I’m going to have to purchase? If so, where?
Also, you said that if I do make the wall lean, I should only make it lean by about one inch. My concern is that it will look like I just didn’t make the wall straight. Would it not be better to get a definite lean, like they do with retaining wall block systems that have a setback for each course? (Although I assume a set back on each row is probably a bad idea.)
If I do make the wall lean, do I do that by making the top of the footing have an angle (one side of the form higher than the other?) Or do I do it by adding extra mortar under one side of the blocks on the first course?
Thank you in advance.
Dan
hi Dan, no problem. For your deadman anchors, go to an industrial supply house, ideally you should be able to find some galvanized steel cable type anchors of various lengths, with a steel bracket on one end that you can notch into a course of blocks (under the next course) The alternative option is to drill blocks and install eye bolts with supporting galvanized plates on the downhill side of the wall –but again that’s not the most attractive option. You you can loop the uphill end around a galvanized screw earth anchor with a cable clincher, –or use a steel plate anchor buried vertically –or even cable-clinch the anchor to an eye-bolt through a RR tie buried n a trench parallel to the wall (-in undisturbed earth!) on the uphill side of the wall.
About the lean, if you bother to lean the wall at all, (and it may not be necessary in your application with the stable slope ) it is neater to lean the footing instead of installing courses with a back-set…back-setting each course really isn’t very attractive unless the blocks are designed for that purpose…. A positive lean IS more attractive — You could lean that wall 4″ or more without a problem if you like that ‘look’ better. You should build something you can be proud of.
You may also wish to consider precast, ballasted blocks, which are specially designed, dry stacking, (lock stone type) but you fill them with ballast rock or gravel. There are a LOT of options. Choose carefully, and have fun.
–btw Dan, if you have a “building center” dealer somewhere handy that also sells precast retaining wall components, they should be able to supply you with anchors.
I have almost pure sand. I would like to terrace with two, two foot walls using concrete blocks without mortar. Possible? We are on a very limited income and this is all we can afford.
Hi Gwenda, if you have almost pure sand on the slope, which tends to be unstable, using 2 two-foot walls and terracing is a good choice particularly if you incorporate minimal footings. Yes, possible, if the slope isn’t too steep, concrete block without mortar can work well particularly if you use a nesting type wall block made for dry-stacking. If the slope is steeper, using ordinary concrete blocks, consider adding a strip of geogrid fabric between the courses, extended on the uphill side. The weight of the fill on the fabric behind the wall will contribute to the stability of the wall.
Another relatively inexpensive option that may be suitable dry-stacked stone ( drystone construction) –if flat stone is available, perhaps free and plentiful locally or even from your own property.
If you are in an area with a lot of rainfall, don’t forget drainage, make sure the sand is free-draining immediately behind the wall to prevent erosion. Best luck with your project! ~R
Pingback: Home Repair: Retaining Wall: Footing Or No Footing?. ~ diy-home-repair.vwx.info
I want to replace a retaining wall for a raised flower bed. Currently there are the wood decorator ties….and they have been there for 15/16 years. They have not been pushed outward in all that time, they simply have just rotted away, especially at the ground level. I have a lot of concret blocks, probably mixed in with cinder blocks, but to conserve expense I wish to use them to make a wall of only 2 courses of block above the ground. The wall length is 16 feet. The foundation is what is throwing me.
Can I just use crushed gravel as a base ? Yes I am ,in cold country, but if I bury 1 row of block 1/2 its height on a gravel base will it not be sufficient? I will use drain pipe at the base behind the wall and gravel fill behind the wall as well. Maybe even bury 1 full block on gravel base, will this work?
I was also planning on using mortar…..or should I dry stack…..please let me know your ideas as I have never done anything like this ASAP. Point is I need to keep expenses down……thank you so much for any help you can offer. Constance
Constance,
In this instance a crushed gravel base would likely suffice, and I would recommend using the “interlocking dry stacking type ” blocks if at all possible, to allow a little flexibility if you’re in that cold climate where frost penetrates the ground.
Avoid mortar if possible; mortar tends to crack and fail with ANY flexing suffered from heaving with frost, so dry stack unless you are pouring a rigid foundation. It sound like your conditions are relatively stable and dry, and the wall height is pretty low. The existing wall suggests the soil is relatively stable, so one full block buried on a sharp crushed gravel base with a drainage pipe and backfilled with gravel should work well in these conditions. Drainage should not be a problem unless you have sudden, excessive rainfall.
Best of luck with your project! Btw, ,,, If you DO decide to use mortar, add Portland cement to the mortar, and use reinforcing rod or metal mesh between the courses, and perhaps even drive a couple of vertical rebar pieces down through all three courses and fill those cavities with mortar for added strength. ~R
Pingback: How To Build A Shed With Cinder Blocks | Woodworkings2016.com
So happy want to pave the 15 feet between my neighbor and my driveway. Our yards slope towards our houses. I would like to build a retaining wall between our houses about 4-5 feet high and backfill before paving. Is there anything we need to do besides typical retaining wall construction to compensate for the weight of the concrete on the existing landh
Hi Barbara,
If you are adding backfill, it’s always a good idea to ensure the fill is compacted properly before paving; 4 to 5′ of backfill will settle substantially unless it is compacted in layers with water and a mechanical whacker –or left to settle for a period of a year or more. There are a large number of variables, the quality and type of the fill, amount of organic matter contained in it etc. To pave over fill not compacted almost guarantees cracking and failure, and unstable fill next to a retaining wall can certainly be problematic.
The weight of the concrete paving should not be a problem if the retaining wall is properly built including adequate compaction of all adjacent fill. Good luck with your project ~ ~R
Hello, I am rebuilding to walls in a stairwell that leads out side from my lower level. The walls are 4 foot high by 5 foot long and are about 50 years old. I want to put a cinder block wall in to replace the old one and I can see a footing at the bottom of the walls, without anymore information do you think I can use these footing’s? Also, will I have to fill every course with cement or can I epoxy rebar every 2 feet into the footer, fill with cement and then put crushed stone in all of the other holes? I’m going to put drains behind the walls and run them out to the street. I’m hoping that this wall will last another 50 years.
Hi Mark, welcome to IncomingBytes!
In planning to rebuild an outside stairwell from a lower level, evaluation of the existing structure can determine why it failed, but can also provide you information you should consider when planning reconstruction.
Generally, if a footing is poorly built/undersized, has heaved, damaged by frost and displays structural failure, it must be replaced. If the wall itself has broken and slumped vertically, failed because of movement of the footing, it is smarter to replace the footing.
Soil creep and lateral soil movement causing the wall to lean in –without any failure of the footing –suggests that the wall itself was defective, not built strong enough for soil conditions, or perhaps it was backfilled improperly with non-draining fill material.
If your 50-year-old wall is vertically stable, remains unbroken and the original footing is clearly solid concrete with no scaling, deterioration or vertical movement, the footing may still be usable when the old wall is removed. Check it out. A well-built footing should be solid concrete, 4″ thick and a minimum of 12″-16″ wide, depending upon wall thickness and local soil conditions.
If you are in a geographic area where soil freezes hard to depth, exterior stairwell wall structures take a beating from freeze/thaw cycles and must resist not only vertical heaving from frost damage, but lateral pressure from inadequately drained, frozen soils which expand. If soil conditions are porous, i.e. sand, gravel etc. and backfill is free-draining, those problems are less likely.
Inclusion of vertical rebar every 2′ into the footing (whether old or new) to resist lateral movement of the wall is essential. Filling ALL cavities in below-grade block walls is also recommended.
Use vertical rebar for lateral stability, fill all block courses and also install rebar horizontally on the top of each course. Note: Although adding ballast crushed rock to cavities in well-drained dry-stack type stacking blocks is common, filling cavities in tightly-mortared block walls with crushed rock is not recommended. Cavities filled with crushed rock in mortared walls can eventually trap enough water which may freeze and shatter the blocks. We recommend filling all cavities with concrete instead.
Your plan for weeping tile drainage at the footing level (holes down!) to the street is correct. If soil conditions are wet, be sure to waterproof or membrane the exterior of the wall prior to backfilling with coarse, free-draining material to grade. Also consider installing a cap-stone on the walls, which not only adds curb appeal but can help minimize long-term water damage of the blocks.
Good luck with your project, and always work carefully with eye protection and gloves when working with mortar. Thank you for commenting! ~R
Thank you for the quick reply! Footing looks good, but the joints are all crumbling along with the cap that was in stalled 50 years. For a 50 year old wall it isn’t in bad shape. Biggest issue is that it now has water flowing through it and over it during hard rains, this coupled with a drain that is only 1 inch in diameter has caused the lower level to flood. Thus I’m going to tear it down, put a French drain all the way around leading do to the street and rebuild with cement blocks.