


© 2008, 2013 by Raymond Alexander Kukkee
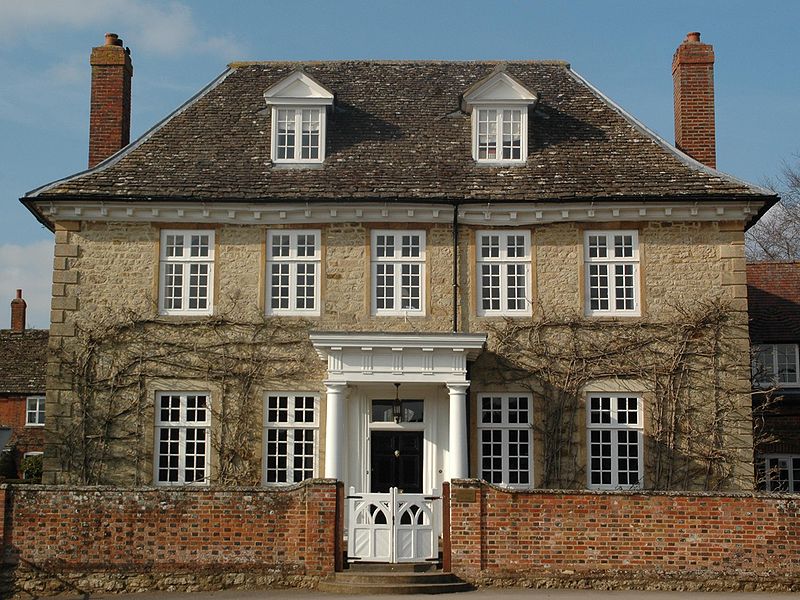
Modified hip Roof photo by Motacilla
Carpentry Skills: Build a Hip Roof
In any row of mundane gable-ended roofs common in North American suburbia, a
hip roof offers a different look and stands out with extra curb appeal. That alone may be appealing enough, but there are other great reasons to build a hip roof. A hip roof is a solid, strong method of roof construction.
The hip roof is attached firmly to all four walls of the structure instead of only two, and the design eliminates some of the weather exposure of gable ends inherent in standard gable-end design. That feature by itself, even more so if coupled with truss or rafter storm anchors, is worth considering in areas prone to vicious windstorms. With an adequate overhang or eaves, the hip roof provides superior building integrity and better overall protection for all components of the building.
With moderate carpentry skills and tools, a basic understanding of framing, and with or without the handy help of a set of tables designed to help simplify the measurement and cutting of the complex rafters, you can build a simple hip roof or even a more complex design.
Compare a Hip Roof to Standard Gable Construction: Understand the difference
Standard roof framing in North America has historically consisted of a
gabled roof built with a “ridge board”, standard rafters, and gable end “lookouts,” a clever means of providing a uniform overhang out on the gable end to match that of the overhang on the sides. Ceiling joists are installed as separate members. A roof with standard gable construction usually has only two planes although dormers and other modifications may be added at the whim of the builder.
In modern gable framing, pre-built “trusses” are now more commonly used. The structure of
the load-bearing truss provides both rafters and ceiling joists, with variations in the truss design depending upon span, with heel modifications often included for specific reasons including design or additional height to allow for modern ceiling insulation requirements.
Increasingly complex truss webs to support taller, substantially steeper roofs complete with dormers are usually computer designed. In gable construction, to finish the end of the roof, a gable ” ladder” or pre-built lookout assembly is simply attached to a truss set back from the end wall and the ladder is
cantilevered over either suitable end wall framing, or an appropriately designed end truss.
A hip roof IS different, because it usually has four planes.
A hip roof may be built using common and traditional “stick” framing, and includes a
ridge board, standard rafters,
end rafters,
hip rafters, and
jack rafters.
For a square building, the roof has four equal planes instead of two. Some hip roofs are called a
“Dutch hip”, or
“half hip” design, leaving very small gables on the roof ends, or larger gables, depending upon personal choice, by first adding more standard rafters. Regardless, at the roof line,
when a hip roof is built, the fascia board attached to the overhanging rafters runs at the same level all the way around the roof .
Very complex, steep hip roofs may be hybrid framing, pre-ordered, designed and built by computer software and delivered to the site with a blueprint to follow. The
standard trusses, clipped support trusses, hip rafters, end rafters, valley rafters and numerous jack trusses are connected together in the correct order using blueprints and supplemental stick framing where necessary.
For everyday, ordinary hip roof framing, the necessary angles and rafter lengths are offered in published tables, and conveniently, also printed upon that standard and essential carpenter’s tool, the framing square. Hip roof framing, however, can be done careful measurement and without tables if time is taken and understanding of the structure is adequate.
Standard Hip Roof Framing
For a standard, stick-framed hip roof, determine the length of the ridge board by subtracting the width of the building from the length. On a hypothetical building 30′ long by 20′ wide, the ridge board would be 10′ in length. On a square building, no ridge board is required, as the sides of the roof terminate at the same point.
Hip roof framing should always begin with the placing of the standard rafters.
For a rectangular building, lay out and mark the position of all rafters “on center” (16″ or 24″ o.c.) clearly on the wall plates, remembering to
start from the same end. In overview,
the assembly procedure is to center and temporarily support the ridge board in the correct position, both plumb and level, by installing two standard rafters raised at the correct pitch to support each end of the ridge board. The ridge board is kept straight by using a correctly positioned carpenter’s line as the remaining rafters are systematically filled in as
opposing pairs, plumbed and and fastened securely to both the ridge board and the wall plate.
Establish the height of the TOP of the ridge board by dividing the building width in half, and multiply that number of feet by the chosen rise. We will assign our 20′ wide building a minimum and arbitrary 4/12 pitch, and it will therefore have a ridge board 10′ long as previously noted. The ridge board will be set up centered. The height is calculated using the pitch , which is 4″ for each foot of horizontal run, (20/2= 10 x 4″ = 40″) so the TOP of the ridge is 40″ above the top of the wall plate.
Since the support rafters rest against the ridge board directly opposing each other, you can easily simulate this initial layout flat on the ground . Precut two opposing rafters, cutting the top end of the standard rafters at the correct angle to establish the pitch.
Mark the angle by holding the framing square diagonally on the edge of the rafter at 4″ and 12″. If you have marked the rafter correctly, when you lift up the rafter to approximate a 4/12 slope with the “point ” up, the cut line should be perfectly vertical.
Forty inches below the peak is the apex of the triangle used to calculate the length of the rafter. In our example, we use simple
Pythagorean geometry to calculate the rafter length.
(Square the height from the apex in inches, add the square of the horizontal run, and calculate the square root of that sum for the length of the third side) In our example ( 40″ x 40″=1600″) + (120″ x 120″ = 14,400) the sum is 16,000 inches, and the square root of 16,000 = 126.49″, which is the length of the rafter.
The length of the rafter must then be adjusted for
half of the thickness of the ridge board, the overhang added as desired,
less the thickness of the fascia board.
The mathematical calculation tells us the rafter should be 126.49″ long, and if we subtract 3/4″ for one-half of the thickness of the ridge board, the length is 125.74″ long to the outside edge of the wall and outside edge of the birds mouth cut, which allows the rafter to sit flat on the wall plate. Place a mark at that point and cut the bird’s mouth to the same 4/12 pitch.
Any rafter overhang required is added to that length. In our example we will use a 24″ overhang, so the total length of the rafter must be 125.74 + 24= 159.75″ less the thickness of the fascia board . Since most fascia boards are 1-1/2″ thick, we subtract that dimension and the final overall length will be 159.75 – 1.5″ = a total length of 158.25″ long.
Leave the rafter ends square and untrimmed until all rafters are installed, at which time they can be trimmed more accurately by establishing a roof-long chalk line. Trim the rafters using a simple jig or bevel square marked vertical cut to ensure accuracy of cut. .
After establishing the ridge board and all of the standard rafters, measure and cut the end and hip rafters, or the rafters that extend to each end wall and four corners from the end of the ridge board. The hip rafter length is calculated in the same manner, measuring from the top of the ridge board to the outside corner of the plate and allowing for overhang.
What does appear to be even more confusing and complex are the jack rafters.
Jack rafters are the rafters that extend from the hip rafter to the wall plate and become increasingly shorter.
To simplify the cutting of jack rafters, forget all other rafters momentarily and consider that the first jack rafter is one specific individual. Remembe
r it must be exactly parallel to, and have the same pitch as the closest standard rafter. The only difference is the
cut angle on the top end, or the “hip rafter end”. A normal cut is 45 degrees, however if framing difficulties arise, use this method to cut an atypical jack rafter angle.
To cut a jack rafter you need a compound angle, meaning cut the pitch angle and the horizontal hip angle are cut simultaneously. After setting the saw to cut the 4/12 rafter pitch angle , for a normal hip cut, merely tilt the blade to 45 degrees.
For an atypical hip structure, the angle is easily measured where the rafter will meet the hip rafter. To measure the necessary angle, place a carpenter square against the last standard rafter, on the long side, but close to the hip rafter. The carpenter square is moved up to locate the exact future o.c. position of the point of the jack rafter (16″ or 24″)
mark the standard rafter and hip rafter at the same time, meaning perpendicular from the last standard truss on to the installed hip rafter. Measure and transfer the resulting acute angle drawn on the hip rafter to your chop saw using a
bevel square. Proceed to cut the rafter. Now you know the length of your jack rafter, since you just marked it on the standard rafter. All you have to do is measure it accurately.
From the line on the standard rafter down to the wall plate is the length of the jack rafter, once allowances are made for the fascia board thickness.
As a matter of logic, always remember the mark at the point’ is the
longest side, so use that point on the hip rafter, always use the “long side” for o.c. reference, and if you have lost the point on the hip rafter, refer to the standard rafter for the exact location the jack rafter must be be nailed at on the hip rafter.
Accuracy counts.
As with standard rafters, jack rafters are always opposing in pairs, and a chalk line should be established to ensure the hip rafter is maintained straight as the hip rafters are installed. Box the final jack rafters inside the fascia board for maximum strength on the overhang.
Now that you know how to build a hip roof without using tables, get out the framing square and check those dimensions. It’s amazing how handy tables can be at times.
#
Is that Incoming I hear?
Photo credit: Motacilla http://commons.wikimedia.org/wiki/User:Motacilla
#hip roof, #how to frame a hip roof, # stick frame a hip roof, #Carpentry skills #modern home construction #DIY carpentry skills
+

