
Timber and Railroad Tie Retaining Walls
Do You Need a New Retaining Wall?
Perhaps parts of your yard have become unsafe, rough, and too steep to cut safely with the lawnmower. Perhaps the soil has already eroded away leaving deep, ugly channels because a poorly-built, ancient log retaining wall collapsed during a big rainstorm. Maybe you're just tired of looking at the mess.
It really doesn't matter why your lawn looks like a moonscape, it just does. Clearly it is time to do something to remedy the eyesore. Offhand comments from your neighbors helpfully suggesting you'll need a well-designed retaining wall built by their contractor cousin Vinny have ratcheted up the pressure to do something, and soon.
If you're like most homeowners, cost is a genuine concern. The new colored stacking concrete blocks your neighbour used to construct his wall look fine, but they are too expensive. You may have already decided not to use inexpensive railway ties because of reasonable concerns about the creosote chemical on them.
The question is, how can you build a new, attractive retaining wall on a limited budget? The answer may be the use of landscaping timber.
Landscaping timbers are pressure-treated timbers that come in various dimensions . Several profiles are available and the timbers are offered in common lengths. One advantage in using structural timbers over railway ties is weight, being somewhat lighter than old railway ties. Alternative "timber" materials including extruded plastic timbers are available, but can be a lot more expensive than natural wood.
Important, basic considerations that must be made in building any retaining walls include the following:
-
Planning: Do draw a plan of the proposed wall in advance, including the height, grade levels, and any necessary abutments or jogs. A plan can and will help avoid making costly mistakes.
-
Height: a retaining wall should not be more than 6' high for safety considerations. Ideally for lighter timbers of smaller dimensions, a retaining wall should never be more than 2- 3' in height. An excessively high retaining wall may also require fencing or guard rails included. Consider reducing the height by stepping the wall back, or installing two lower retaining walls instead of one, and take advantage of the potential decorative appeal a landscaped flat between them offers. Check with your local jurisdiction for any restrictions and restrictive design criteria, and also obtain a building permit if necessary
-
Drainage: Excessive water movement through the soil, or on the surface can and will seriously damage a retaining wall that is not provided with drainage. If excessive surface water runs down the landscape, do consider installing a French drain. (See: How to build a French drain) For structural stability, include arrangements for drainage in the form of coarse gravel backfill and a perforated weeping tile on the uphill side of the base.
-
Structural Stability: If the proposed wall is both long and high, the design must include abutments, vertical support posts, deadmen timbers or the equivalent. Right-angled offsets may be incorporated into the basic plan to provide extra strength. A right-angled offset may also be used to advantage in the design ---to incorporate an access stairwell. These measures prevent the wall from "pushing out" typically with subsequent distortion and eventual structural failure of the wall.
Material Supplies Required
You will need to calculate how many timbers are required. Measure the length and height of the proposed retaining wall. You will also require:
-
Crushed stone or crushed coarse gravel for the wall footing.
-
Sections of reinforcing steel bar, or galvanized pipe
-
An appropriate length of 4" perforated weeping tile
-
Fill and topsoil
-
Reinforcing steel bar, or galvanized steel pipe
-
Long lag bolts or spikes.
-
Deadmen galvanized cable (optional) and suitable T' anchor plates, galvanized, sized for the timbers chosen
-
Wooden stakes or pickets
Tools required:
-
Tape measure
-
Carpenter's line
-
Carpenter's 4' level, a line level, laser or transit level if available
-
Drill and appropriate drill bits
-
Sledgehammer, 5 or 10 lb.weight
-
Shovels, pick axe, and rake
-
Hand saw or Chain saw
-
Grinder, steel cut-off saw, or hack saw
-
Vibrating (whacker-packer) plate packer if available

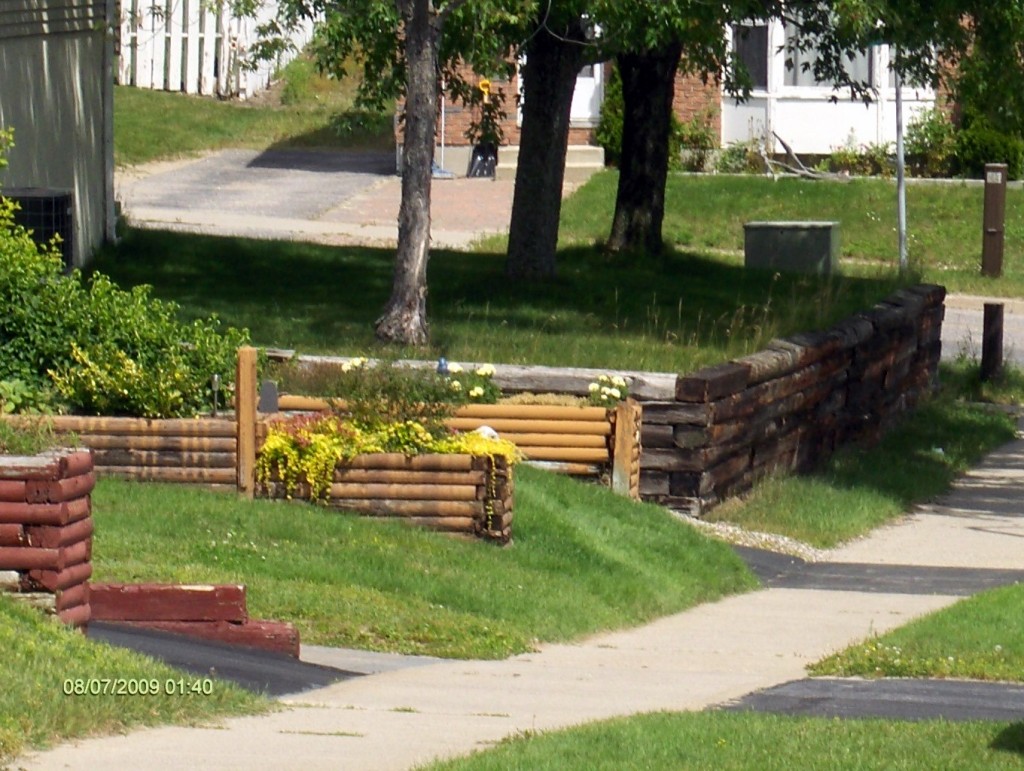
Where can I get the timbers (about 4″x3″x8′) with curved sides exactly like the ones in the photo. I have seen them at Home Depot but they always seem like rejects. Twisted, inconsistent treatment color (all shades of green to natural color).
I am replacing a 3-tier wall that is decorative only and holds back nothing.
I cannot locate where these are sold.
I live in Nassau county, Long Island, New York
Hi Thomas, thanks for bringing this issue to light, poor quality timber is a universal problem. Building supply centers often bring in materials that may be inferior quality for ‘sales’ and loss leaders; and inevitably the ‘best’ are quickly gone.
Likely the smartest bet may be to have your building center bring in an order of timbers specially for you, with the understanding you will definitely reject bad quality material. The customer is king–most building centers will do anything to keep their customers happy.
Usually on general inventory deliveries with materials like these timbers –destined for special sales events or not– the best pieces are very quickly picked over by eager customers –and much of the remaining material available to latecomers naturally ends up being poor, even reject-quality pieces that are unacceptable considering the prices being charged for timber these days. Best luck with your project!
CORRECTION TO PREVIOUS COMMENT:
The dimensions should be: 3″X5″X8′
The same principle applies for virtually any timbers of this type, creosoted, treated or otherwise, Thomas. Most timber retailers will do their best on all sizes. Keep in mind that aesthetically top- quality timber is increasingly hard to find even for the largest retailers. You might luck out at one of the smaller rural building centers. Again, good luck finding them. “:) ~R
How far apart should your dead man timbers be.
Hi Noreen, it depends how long your face timbers are; if they are 8′ and the proposed retaining wall structure is high, place dead man timbers (at right angles to the wall) at the end of each face timber, every second course. If the timbers are 12 or 16′ long, do the same thing using “T” brackets (steel, galvanized) using lag bolts to attach the dead men. Always used ‘galvanized’ bolts and hardware so they are not subject to failure from rusting.
If the structure is not high, or too long, one or two dead men on the second and forth( if you have 4-5 courses) should suffice.
Good luck with your project “:)